This is the comprehensive guide to FolderMill.
FolderMill is a server-based software able to automate converting and printing of multiple files as well as many other tasks with the use of Hot Folders.

Getting Started
- Initial Setup
- FolderMill Control Panel
- Hot Folder Settings
- FolderMill Data Directory
- Adding and Combining Actions
Filter by… Actions
- Process only pages or documents containing specific text (filter mask can be inverted)
- Process files by file name or file extension (filter mask can be inverted)
- Filter incoming files depending on the number of pages (include or exclude from processing)
- Include or exclude incoming files from processing depending on their color (color or grayscale)
- Filter incoming files depending on paper size format or custom dimensions (include or exclude from processing)
Watermarking Actions
- Add a barcode (QR Code, Data Matrix, etc.)
- Put a custom text watermark on documents
- Place an image-based watermark automatically
File Editing Actions
- Rename files using custom text, a regular expression, or a macro
- Perform image/page cropping based on margins or rectangle that can be customized
- Change image/page size to custom dimensions or a specific paper size format
- Automatically rotate incoming images or pages within documents based on set parameters
- Insert a user-specified file or blank page at the beginning, middle, or end of a document
Primary Actions
- Print incoming files to the selected printer(s)
- Convert files to PDF format
- Convert files to JPEG, PNG, or TIFF format
- Convert XLS to XLSX/CSV/ODS format
- Convert files to XPS format
- Execute an application or a script file (with command line parameters if necessary)
- Stop further processing of the current series of Actions within a Hot Folder
Send… Actions
- Copy the incoming source files to a new location
- Send incoming files to a specified email address via SMTP protocol
- Upload files to an FTP server (FTP/FTPS/SFTP)
- Upload files to a web server (using URL)
Miscellaneous
- Activation & licensing
- Back up your FolderMill configuration and settings
- Convert password-protected Word, PDF files, and archives
- Customize alert notifications
- Export logs with FolderMill events
- Lock/unlock the FolderMill Control Panel
- More tips & tricks →
Getting Started
Initial Setup
To get started, please download and install FolderMill.
On the first launch of the program, the Initial Setup menu appears. You'll be prompted to enter the default FolderMill Data Directory where Hot Folders will be located. It is recommended that you keep this folder at the default location (C:\FolderMill Data) to avoid any issues with accessibility.
But you can change the default location to any other one by clicking the "Browse" icon – a local or a network folder path can be used. If you're not ready to decide yet, keep it default. You will be able to select another location later in the program's General Settings.

FolderMill Control Panel


Start button runs FolderMill real-time processor. Once running, the program continuously monitors all active Hot Folders and processes incoming files according to added Actions.
Hot Folders section manages Hot Folders. Click Create new to create a new Hot Folder and assign Actions to it. Available controls:
- Edit – edit settings of a selected Hot Folder;
- Duplicate – make a copy of a selected Hot Folder;
- Delete – remove selected Hot Folder (including or not including is subfolders);
- Export or Import – save or load rule files as a .rule file, flat-rule or a ZIP archive with all rules and settings;
Dashboard displays information on currently processed files and indicates active Hot Folders.
Task manager provides information about the program's processes, somewhat similar to the Windows Task Manager. It allows checking current tasks and includes relevant information about the status of each processed file.

Settings menu manages FolderMill's General Settings. They include Run FolderMill as service, paths to FolderMill folders, Multitasking mode, response timeouts, and more.
Events log opens a record log of all operations. You can browse between General log, Completed jobs log, and Error log.

About opens a window with information about the program version, web links to purchase the commercial version page, FolderMill homepage, link to the support service page, and information about the program's build.
Status bar displays the current status of FolderMill: Inactive, Waiting for documents…, or Processing active Hot Folders.
Hot Folder Settings

After creating a Hot Folder, you'll see the Hot Folder Settings menu. In this menu:
Name of the Hot Folder. You can enter a preferred name for your convenience to distinguish between multiple Hot Folders.
Folder is active/paused toggle enables you to pause this Hot Folder. Any Hot Folder can be paused while others are up and running. Resume its work by clicking this toggle button. You may also pause/activate it from the context menu by clicking the right mouse button on a specific Hot Folder.
Set the Source for incoming files (a location where FolderMill checks for new files). It can be:
- Folder: local or network-based;
- FTP directory (FTP/FTPS/SFTP);
- Email box (IMAP/POP3).
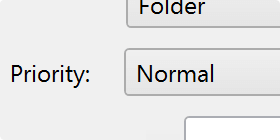
Priority lets you set Hot Folder priority: High, Normal, or Low. Files sent to a high-priority folder will be processed first. You can also set Custom priority value for each Hot Folder within a list of Hot Folders to define it more precisely.
Use file mask – this is a file filter that can be optionally used to include (Process only) or exclude (Process all except) incoming files. When the Process only option is selected, only those files that meet specified criteria are processed. All other files are kept intact and will remain in the Incoming folder. To configure this file filter, you can enter multiple masks separated by comma. Masks may contain commonly used wildcards (e.g., * or ?).
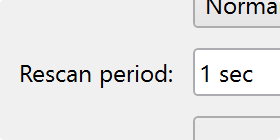
Rescan period sets a period when FolderMill will check for new files in the Source (Incoming folder). In other words, it sets time intervals when the program should "scan" the Hot Folder and take action. By default, it is set to 1 sec. For a longer period, you can change seconds to hours or days (24 hours).
Move source files to "Processed" folder setting controls what to do with the source files. By default, it is enabled, and the original source files are automatically moved to the "Processed" folder. You can also define time intervals when to delete the source files – using the setting Delete files in "Processed" after…
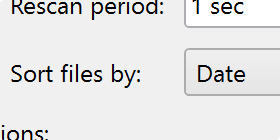
Sort files by – this setting can sort incoming files by a specific parameter, such as name, type or date. Please note that the files will be sorted only after the retrieval of a group of files from the Source.
The default setting is Unsorted. If you need a strict order of file processing, you can select different options (e.g., Name, Type, Date, Size, Path). But in this case, multitasking for that Hot Folder will be disabled to maintain the sort order.

Sorting files By name is convenient especially if you want to merge incoming files using the same file name.
Create new Action Set – this button adds Actions to be assigned to the current Hot Folder (Add new Action). By clicking the Create new Action Set button, you can create independent combinations of Actions. An Action Set may include a set of Actions that will be performed consecutively. Each Action Set starts working by processing the original source files.
Advanced settings – this button opens all existing Hot Folder settings. In most cases, you won't need to change them unless it was advised by our support service but you'll find some useful settings there as well.
FolderMill Data Directory
If you choose Folder as Source, the program will usually create 3 subfolders in the Hot Folder (located by default at C:\FolderMill Data\Hot Folders\1):

Incoming folder is where input files are placed by users or another software. Drag'n'drop or copy files into this folder.

Output is a folder where output documents or images will be stored after being processed by FolderMill, e.g., converted.

Processed is a folder where original input files will be saved after processing (if Move source files to "Processed" folder is enabled).
For your convenience, create shortcuts for each Hot folder or its subfolders for any user involved via LAN network or Internet. Thus, multiple users can work with the documents together.
Adding and Combining Actions
The Add new Action button creates a new Action in the Action Set. You can add a single Action, a combination of Actions within an Action Set, or even several parallel independent Action Sets.
When there's a series of Actions in the Action Set, each incoming file undergoes a series of operations. For example, you can make up combinations such as:
Filter by filename → Add text or file watermark → Convert to Image → Print document.
Several Action Sets within one Hot Folder are usually created when the first Action is a Filter by… Action.
After you’ve added all the desired Actions, you can swap them – click and hold an Action icon and move it left or right between others to arrange them in proper order. Then, release the mouse button to place it where necessary.

According to the configuration on the screenshot above, all incoming TXT (.txt) files will be converted to PDF and then printed. All others (non-TXT files) will be sent to the folder "C:\Out".
Where to find the output (converted) files?
For each Convert to… (and Copy document) Action, an output location can be defined in the Action settings (see Output folder). You can change the output folder path as needed – this is the place where the resultant files will be placed once processed.

What happens if you uncheck "Output folder"?
You can disable the Output folder option for some Actions. In this case, files won't be saved at this point, but they will be passed on to the next Action. Disabling this option is mainly needed if you want to send processed files to an email box or FTP server as a final Action (Send to Email, Upload to FTP, Upload to HTTP).

Filter by… Actions
Filter by file contents
")
Process or skip certain files according to text inside documents. FolderMill will search for specific text and let documents or individual pages with this text go further to the next Action (Process only…). Alternatively, you can prevent some files from being processed (Process all… except those). Besides plain text, you can also use commonly used wildcards:
- Asterisk (star, *). The asterisk is the wildcard character which stands for any string of characters (or no characters at all).
- Question mark (?). The question mark matches a single arbitrary character.
Filter by filename

This Action allows you to filter incoming files by file name and/or file extension and pass them through to the next Action. Define which files are to be processed or ignored according to the filename mask (Process only documents or Process all documents except those). Any text or common wildcard characters can be used (e.g., * or ?).
Learn more about Filter by filename Action →
Filter by number of pages

This Filter Action can filter incoming files according to the number of pages inside a document. Enter the number of pages and select a relational operator.
It can help you, for example, send documents with many pages to one printer and those with few pages – to another.
Filter by page color

The Filter by page color Action allows you to filter incoming documents or images based on their color (either "in color" or "grayscale"). FolderMill can detect the content of pages or images and either pass them to the next Action or exclude them from processing.
For example, you can send color documents to one printer and black and white documents to another.
Which pages will the program check if there are multiple pages?
By default, FolderMill will check the first page (or the only page if there is only one). However, you can also select a specific page to be checked using Page range in the advanced settings of this Action.
Filter by page size

Filter by page size Action lets you process certain documents depending on their page size. Configure paper size by setting a custom or pre-defined format (e.g., A4 or Letter, etc.).
Using this Action, you can also distribute documents to different print queues by combining different size filters. For example, documents with pages less than A3 format may be sent to a small office printer whereas larger documents (A3 or larger) go to the plotter.
Learn more about Filter by page size Action →
Watermarking Actions
These actions allow you to apply either a Barcode watermark, a Text watermark, or a File watermark (image-based watermark) to a document or а group of documents.
Barcode watermark
Barcode watermark allows you to add a customizable barcode to document pages or images. Available barcode types include QR Code, Data Matrix, Code 128, EAN 8, EAN 13, UPC A, UPC E, and more.

Learn more about Barcode watermark →
Text watermark

You can add a text watermark to incoming documents. There's a variety of available settings to adjust a watermark. You can select font, font size, formatting, text color, background, position, rotation, page range, and other parameters.
Besides, there's a set of macros (Macro) that allow you to add page numbers, a total number of pages, date/time, source folder name/path, original filename, and more.
Learn more about Text Watermark →
File watermark
Click the folder icon and choose an image, a PDF, or an HTML to be used as a watermark.

You can adjust the watermark's alignment, rotation, opacity, and set margins. You can also change page range and watermark size. For instance, it is possible to resize it using a percentage of page size.
Learn more about File Watermark →
File Editing Actions
Rename document

This Action changes names of processed documents. By default, it is set to {*SrcFileName} – source file name.
Learn more about Rename document Action →
Crop document
The Crop document Action allows you to automatically apply cropping to document pages/images. This Action has two modes: Crop margins and Crop rectangle.

Crop margins
The Crop margins operation performs image/page cropping based on margins that can be customized. You need to specify the indents (Left, Right, Top, Bottom) so that the program can crop your files.
Additionally, you can set Page range — to apply this operation to selected pages or page ranges. Enter page numbers and/or ranges separated by commas next to Apply to a page range. For example: 1,3,5-10
Crop rectangle
The Crop rectangle operation crops the image/page by the border of a rectangle whose dimensions can be customized. You can set the width (Width), height (Height) of the rectangle and the indents from the left side (Left) and top (Top) of the page or image.
You can also set the Page range to apply this operation to selected pages or page ranges. Enter page numbers and/or ranges separated by commas next to Apply to a page range. For example: 1,3,5-10
With Crop document Action, you can not only crop but also enlarge the canvas of the document pages being processed.
For example, Crop margins: -3 mm, -3 mm, -3 mm, -3 mm. Or Crop rectangle: use dimensions that are larger than the original page's.
Resize document
This Action allows you to change the size of incoming document pages or images — make them smaller or bigger.

You can choose between a paper size format (e.g., A5) or custom dimensions (pixel, mm, cm, inch). If necessary, you can specify a page range — by selecting specific pages to be resized (Page range).
Additionally, you can set a condition for when the resizing should occur. For instance, you can choose to resize only if the source file's page size is in A3 format.
Advanced settings
The Resize document Action offers advanced configuration options for precise control. You can adjust parameters such as DPI, scaling method, fill color, rasterization resolution, anti-aliasing, and more. You can check them by clicking the Advanced settings button.

Rotate document
The Rotate Document Action in FolderMill allows users to automatically rotate incoming images or pages within documents based on set parameters. Users can define the angle of rotation (0°, 90°, 180°, or 270°) and the direction (Clockwise or Counterclockwise). The rotation can be applied to all pages in the document or limited to a specific page range.

Insert file
Insert file action allows you to add a specific file or empty page(s) to the beginning, middle, or end of a processed file.
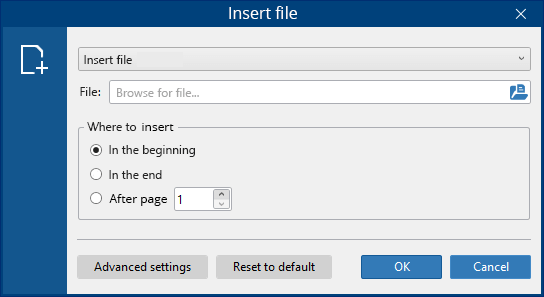
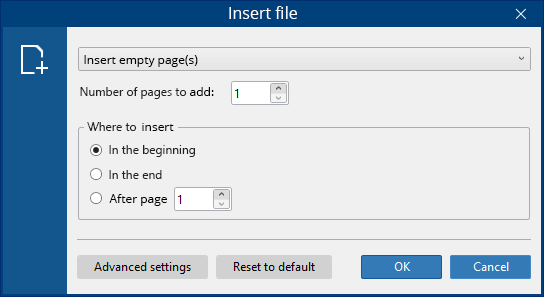
This Action has two modes: Insert file and Insert empty page(s). This means you can choose to either insert a custom file or insert one or several empty pages at the beginning, after a certain page, or at the end of a document.
Primary Actions
Primary Action is the one that can work on its own – no other Actions are required.
Print document

This Action allows you to print documents to a selected printer using certain printing preferences. You can choose basic print settings like page range and the number of copies. Besides, you can adjust page scaling, enable or disable printing email attachments, and automatic rotation to landscape or portrait orientation.
Besides, you can access your printer properties by clicking the Properties button. From there you can manage other options (e.g., RGB or CMYK color mode or a custom color profile) that will depend on your printer model.
In the Advanced settings of this Action, you will see many more options that can be adjusted to your needs, such as printing in Multiple pages per sheet mode or Single print job mode.
Want to print to several printers at the same time? You can automate printing to different printers with FolderMill.
Once the Action is configured and FolderMill Processor starts running, you can simply place documents into the Incoming folder – the files will be immediately sent to the selected printer.
Learn more about Print document Action →
Convert to PDF

This Action allows you to convert your files into PDF format:
- Overwrite existing file: Keep both files or overwrite if a file with the same filename already exists in the output location;
- Multipage mode allows you to choose either of 4 options:
As in original file
Keep the structure of original source files
Split into single pages
Create a separate PDF file from each page of the source document
Append to existing PDF file
Add new files as pages to the existing file with the same filename (in the end of the document)
Insert before existing PDF file
Add new files as pages to the existing file with the same filename (in the beginning of the document)
Append to… and Insert before existing PDF file options can help you create a combined multipage PDF out of several various files all merged into one.
Learn more about Convert to PDF Action →
Convert to Image

This Action has the following settings:
- Overwrite existing file: Keep both files or overwrite if a file with the same filename already exists in the output location;
- Image format: JPEG, PNG, or TIFF. For each format, you can choose color space, output file quality, resolution, and resize options for the output image;
- Color space: allows setting color space which defines the number of colors;
- Compression (for TIFF format) allows to select Default, Flate, LZW, or JPEG compression method for TIFF files;
- Multipage (for TIFF format) mode allows you to choose either of 4 options:
As in original file
Keep the structure of original source files
Split into single pages
Create a separate TIFF file from each page of the source document
Append to existing TIFF file
Add new files as pages to the existing file with the same filename (in the end of the document)
Insert before existing TIFF file
Add new files as pages to the existing file with the same filename (in the beginning of the document)
Append to… and Insert before existing TIFF file options can help you create a combined multipage TIFF out of several various files all merged into one.
- Rasterization resolution defines the resolution and quality for rasterized vector files (e.g., PDF, VSD, CDR, AI, PSD). The value for DPI (Dots Per Inch) is 300 by default; we recommend setting it up to 1200 maximum;
- Resize output image allows to set a certain size for the output files (in pixels): Don’t resize, Fit rectangle, Fit width, Fit height, Thumbnail (fit rectangle and fill color). Additional options are available in the Action's Advanced settings > Resize > Fit mode.
You'll find more settings by clicking the Advanced settings button.
Applying an external ICC profile
FolderMill offers an option to apply an ICC (International Color Consortium) profile during the image conversion process. This feature allows you to embed a specified color profile into the converted image. This will allow to ensure consistent color management in line with your specified ICC profile.
To apply your ICC profile:
- Navigate to the Convert to Image's Advanced Settings:
In the Convert to Image Action window, go to Advanced settings → Raster images section. - Set the Color Profile action parameters:
Use either the option Apply external profile or Apply embedded profile (if it is not RGB) option. Here you can manually select an external ICC profile to embed in the output image. - Specify ICC profile filepath
If you select Apply external profile, you’ll need to provide the file path to the desired ICC profile. - Save settings
After setting the ICC profile parameters, click OK to ensure saving your settings and the conversion will apply the selected profile when processing images.

Learn how to customize filenames of output image files →
Convert XLS...

This action allows for automated conversion of Excel sheets from XLS to XLSX/CSV/ODS format.
Note: This action is rarely used, so it might be hidden in your version of FolderMill. To unhide it, navigate to General Settings > Miscellaneous and set Enable extended features to Yes.
Convert to XPS

This Action lets you automate file conversion to XPS format.
Note: this Action is rarely used that's why it may be hidden in your version of FolderMill. To unhide it, go to General Settings > Miscellaneous and set Enable extended features to Yes.
You can make the XPS output file size smaller – just check the box next to Minimize file size in the Action's Advanced settings.
Run custom application

Run custom application – this Action allows you to execute an application or a script file. Additionally, you can set command line parameters. This Action is usually used to perform some custom operations that are beyond the scope of FolderMill functionality.
- Path to application or a script file: set path to a third party application that would run a command or script (e.g., to run a PowerShell script);
- Command line parameters: set additional parameters for the application or script used. Using the Macro button, you can add macros: Source document full path, Source document name, and more;
- Run in hidden mode – if this option is enabled, FolderMill does not show the window of executed application or script;
- Wait until process is finished – if this option is enabled, FolderMill waits and does not resume its work until the application or script process is completed.
How to run a PowerShell script
To run a PowerShell script, add the Run custom application Action and configure the following settings below.
Path to application or script file:
powershell
(or powershell.exe)
Command line parameters:
-file <.ps1 filepath> [param1] [param2] ... [paramN]

The Run custom application Action can check if your application or script is running correctly. To do this, open its Advanced settings and activate the Check return code option.

If the result is a return code of 0 – it means successful execution, in other cases unsuccessful. If the return code is not 0, the behavior of FolderMill will depend on the Error handling mode.
How to run a batch (.BAT) script
To run a BAT script, add the Run custom application Action and configure the following settings below.
Path to application or script file:
cmd
(or cmd.exe)
Command line parameters:
/C <.bat filepath>[param1] [param2] ... [paramN]
(or <cmd command> instead of <.bat filepath>)
 script")
Break
The Break Action allows you to interrupt Hot Folder execution at any point within a sequence of Actions. When added after any Action (e.g., Print, Convert), it terminates the current series of Actions. This feature allows for flexible rule management within your Hot Folder.
You can use the Break Action at your discretion to create your own configurations. It works similarly to the "break" operator used in programming. The "break" operator is a control-flow statement used in many programming languages to immediately stop the execution of a loop or switch block.
Example
Complex task from a customer:
- Documents smaller than A3 should be printed on Printer_1
- Documents larger than or equal to (≥) A3 and smaller than or equal to A2 (≤) should be printed on Printer_2
Without the Break Action, it would look like this:
- If page size < A3 → Print on Printer_1
- If page size ≤ A2 → If page size ≥ A3 → Print on Printer_2
This setup is more complex since it requires several page size filters to divide documents into two ranges in order to avoid overlapping.
With the Break Action, the configuration is greatly simplified. Additional "reverse" paper size filters are no longer needed, and processing stops after the "break" Action is met:
- If page size < A3 → Print on Printer_1 → Break
- If page size ≤ A2 → Print on Printer_2 → Break
Therefore, Break Action avoids redundant checks by stopping execution after the condition before Break is met, making the configuration much simpler and cleaner.
Thank you very much for adding the Break function! This greatly simplifies sorting functions for us without filling up the "Unable to process" folder.
— feedback from a customer
Send… Actions
Copy document

This Action creates copies of the incoming files and transfers them to a specified location. Set path to the new folder by clicking the folder icon.
Besides, you can modify the output folder path by using built-in macros. To do it, click the Macro button and add regular expressions, date/time, or filename. You may also set a "My documents" (C:\Users\Username\Documents) or "Common documents" (C:\Users\Public…) location.
Set up attachments handling for the Copy document Action
For this Action, there are several ways to customize the handling of file attachments. In the Advanced settings, you can choose to ignore attachments, save only attachments, or save both the container (original file) and its attachments.

Send to Email

This Action provides sending incoming files to a specified email address via SMTP protocol.
You can configure the subject and the body of the email and set other parameters. By default, the recipient will get an email with the subject: "{DocName}" received from FolderMill. The document comes as an attachment to it.
You can send the email to multiple recipients at once. Just add multiple addresses in the To address: field, each separated by a semicolon (";").
What password should be used?
The "default" password (your personal password that you normally use to access your mailbox via the web interface) may not work. In this case, generate and enter an external app password.
How to add the file's metadata and other additional information
The Send to Email Action allows you to include the original file's metadata in the email. This includes details such as the file's author, recipient names, date, time, and more. You can do this by right-clicking on the Subject or Body field and selecting Add macros.

How to send multiple files from the previous Action as attachments
FolderMill can receive all the files created as a result of splitting an email with attachments or a PDF Portfolio (the "container" file) and transfer them to the following Send to Email Action. As a result, both the main file and its attachments will be sent to the mailbox successfully. For example:
Multipage document → is converted into 10 JPEGs → all files get sent to the mailbox
To do it, uncheck the Output folder option for the Convert to... Action:

Note: this works for Convert to... Action + Send to Email Action only. In all other cases FolderMill works with one "container" file only whenever there is a series of Actions.
Want to be notified only when new files appear in the Source and not receive attached files via email? Uncheck the Attach document to Email option in the Advanced settings.
Upload to FTP

FolderMill can automatically upload files to an FTP server. FTP (File Transfer Protocol), FTPS (FTP with TLS/SSL), and SFTP (SSH File Transfer Protocol) protocol types are supported.
You can specify a path by entering it in the Target FTP folder setting. For instance, if there's a subfolder in your FTP root folder, just enter the subfolder's name next to the Target FTP folder. But filling this field is not necessary. If you leave it blank, the default directory will be used.
Test your connection
After filling out all the fields, it is advised to check your connection by clicking the Test FTP Connection button. This is necessary to ensure that FolderMill maintains a stable connection with your FTP/FTPS/SFTP server.

Various types of SFTP authentication
Various types of authentication are available. It is possible to use SSH (secure shell) encrypted protocol to connect to an FTP/SFTP/FTPS server. SSH keys can provide a higher level of security compared to username and password authentication.
For the Upload to FTP Action and Source: FTP, you can choose different types of authentication:
- Username and password
- Username, password and SSH private key file
- Username and SSH private key file

What is the difference between FTP, FTPS, SFTP
FTP (File Transfer Protocol), SFTP (SSH File Transfer Protocol), and FTPS (FTP Secure) are all protocols used for transferring files over a network, but they differ in terms of their underlying mechanisms for security and data transfer.
- FTP: Standard, insecure file transfer protocol.
- SFTP: Secure file transfer protocol using SSH for encryption.
- FTPS: FTP with added security through TLS/SSL encryption.
Learn more about these protocols →
Upload to HTTP

This Action uploads incoming files to a specified web location.
If a website requires authorization, specify login credentials in the Advanced settings of this Action by entering the Username and Password.
In the URL field, you can use macros like {*SrcFileName} to insert the original source file name of the file you're uploading.
Miscellaneous
Activation & licensing
When you install the commercial version, you are prompted to activate the program at the first launch. For automatic activation, keep the option Get activation code automatically (recommended) selected and click Next.

If automatic activation fails and throws an error, shut down and restart the FolderMill Control Panel. If the error persists, try manual activation (see steps below) or contact our Support.
Manual activation
If the automatic activation is not possible due to no Internet access, lack of admin rights or another reason, follow the steps below.


- Select Enter activation code manually;
- Open the link activation.fcoder.com;
- Click the Get Activation Code button;
- Copy the generated Activation Code;
- Enter the Activation Code in the FolderMill Activation window and choose Next.
Automatic activation doesn't work? You can get the activation code using any other web-connected device (another computer, smartphone or tablet) and then enter it where FolderMill is being activated.
The fCoder Activation Server (activation.fcoder.com) can be accessed from any Internet-connected device. Still, if you have any difficulty activating your license, please contact our support.
How to back up your FolderMill configuration and settings
Once you have set up everything, we advise you to backup settings and Hot Folders. To do it, open the FolderMill Control Panel and click the Export button. You'll be prompted to save all current rules and settings as a .zip file.
Please note that when you reinstall FolderMil, the user account of FolderMill Service might be reset to the default local system account.
When you re-install the program, upgrade from free trial to the full-featured commercial version or from older to newer version, your FolderMill configuration (Hot Folders and rules) is kept safe automatically on your computer.
Convert password-protected Word, PDF files, and archives

FolderMill can process Word files, PDFs and RAR, ZIP, 7ZIP archives with password protection. FolderMill doesn't have access to such files until you enter a password (or list of passwords) to handle password-protected files.
- Add Convert to Image or Convert to PDF Action;
- Open Advanced settings;
- Find entry Password list;
- Enter a password and click OK. You can enter multiple passwords (each on a separate line).
FolderMill will try all passwords you've entered in order to process each incoming password-protected archive, Word or PDF file.
Want to password-protect output files? Select PDF standard: Password protected and enter a password or do the same for the setting Destination file password in the Action's Advanced Settings.
Customize alert notifications
In order to instantly get any warnings or errors on file or folder access restrictions or other types of notifications, you can enable sending them to your email in the General Settings.

If necessary, you can send these email alerts to multiple addresses. Simply enter several addresses in the "To address" field, separated by a semicolon (";").
Export logs with FolderMill events
FolderMill Report is a standalone utility that enables you to export and save FolderMill logs in TXT format for a specific time period. You can choose different types of events such as Completed jobs, Error jobs, or both. To use it, execute the FolderMill Report.exe file located in the FolderMill installation directory.
Learn more about FolderMill Report Utility →
Lock/unlock the FolderMill Control Panel
FolderMill administrators may wish to restrict other users from making changes to the program. To accommodate this, we've included a feature that allows the Control Panel to be locked with a password. You can easily set up your password in General Settings → Interface → Password to unlock Control Panel.
If you have any questions on FolderMill features, configuration or need help with specific tasks to be performed, please feel free to contact us!